Dew Heaters and Controllers: Complete Setup Guide
By DeepField Editorial Team · 9 min read · Updated June 2026
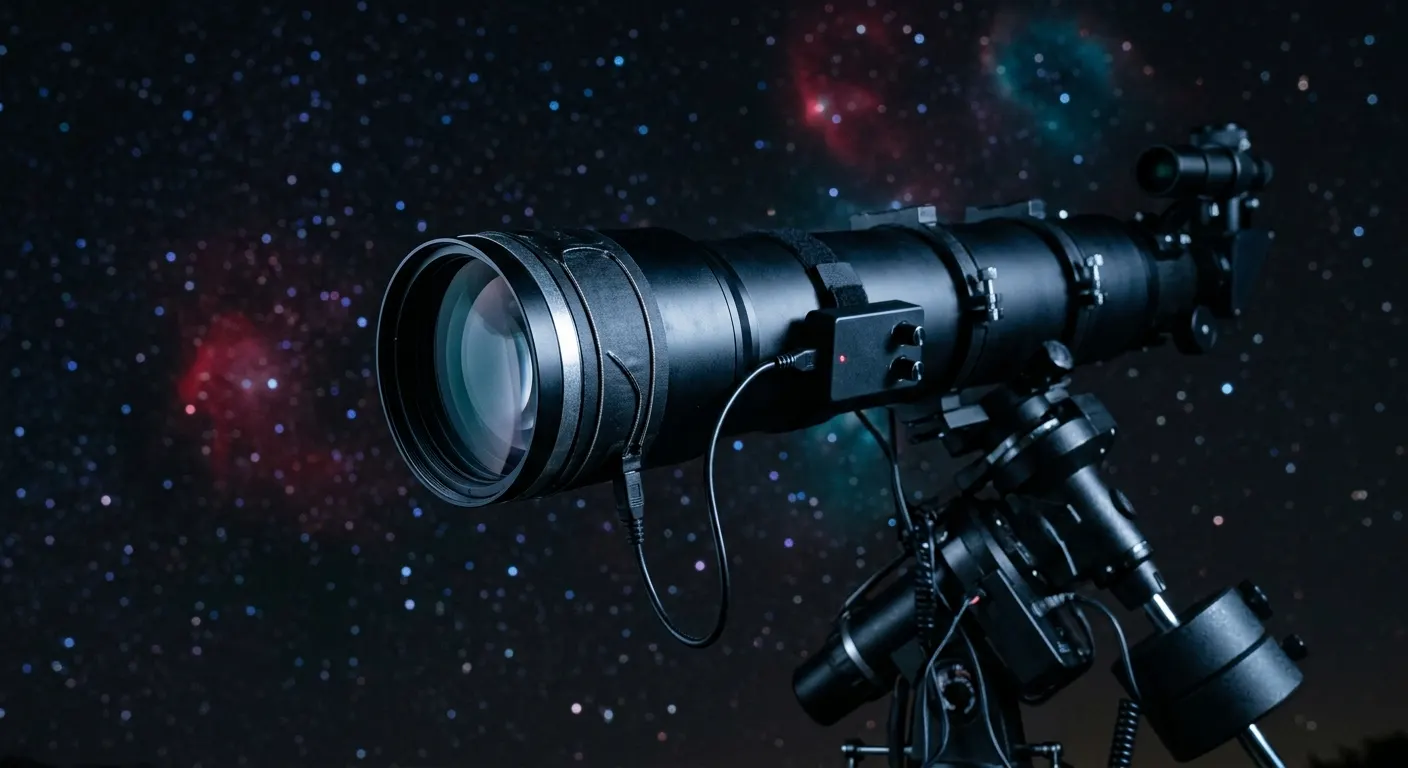
Dew is a silent session-killer. It forms on telescope lenses, corrector plates, and camera sensors whenever the optics cool below the local dew point, which happens faster on clear nights than you might expect. A well-designed dew heater and controller setup keeps every surface a few degrees above the dew point all night long with minimal power draw. The Pegasus Astro DewMaster 2 Digital Dew Controller is the gold standard for a full imaging rig, but you do not need to start there. Even a Dew-Buster DB-1 Dual-Channel Dew Controller and a couple of Dew-Not Dew Heater Strips (Various Sizes) beats the alternative, which is a ruined session and a damp objective that takes the morning to dry. Here is how to plan and set up a complete dew prevention system.
Quick answer
Mount a dew heater strip around every dew-sensitive optic: the main objective or corrector plate, the guide scope, and any flat panel or finder. Connect the heaters to a PWM controller and set power to 30 to 50 percent to start. The Pegasus Astro DewMaster 2 is the best choice for a full rig with five channels and Wi-Fi automation. A simpler two-scope setup works well with the Pegasus DewZap.
This guide contains affiliate links. DeepField may earn a commission at no cost to you.
Why dew heaters matter more than most beginners expect
Clear nights have the strongest radiative cooling because there is no cloud layer to return radiated infrared to the ground. A telescope optical element can cool several degrees below air temperature in two to three hours, easily falling below the dew point even when the air feels dry. A fogged lens in a deep-sky image shows up as a gradual drop in contrast and sharpness that is almost impossible to calibrate out in post.
The guide scope is the most frequently overlooked surface. Because it is small and people focus on the main objective, the guide scope lens is often left unheated. A dewed guide scope makes the guide camera lose the guide star, and the resulting unguided tracking produces trailed stars across the entire session from that point forward.
The rule of thumb is to heat every dew-sensitive optical surface you own: main objective or corrector plate, guide scope, finder scope, any external flat field panel, and the camera dew shield if your sensor runs cold.
Choosing dew heater strips: Kendrick versus Dew-Not
Dew heater strips are sold by the diameter they wrap around. Measure the outside diameter of the dew shield or lens cell, not the aperture of the telescope. A 4 inch aperture refractor may have a 5 inch outer diameter dew shield, and you need a heater sized for the dew shield.
For long-term durability and even heat distribution, the Kendrick Astro Firefly Dew Heater Strip is the premium choice. Kendrick strips use a uniform heating element pattern that prevents hot spots, which can create thermal turbulence in the image near the objective. These strips are built to last years of regular field use.
If budget is the priority, the Dew-Not Dew Heater Strips (Various Sizes) use the standard RCA phono connector that all major controllers accept and cost roughly half what Kendrick charges for equivalent function. They work reliably; the difference is long-term durability and build quality rather than performance per heater-watt.
Both brands connect via a standard RCA plug, so you can mix heater brands on the same controller without any adapters. Buy one size up from what you think you need; a heater that wraps slightly too large works; one that is too small does not close properly around the optic.

Kendrick Astro Firefly Dew Heater Strip
A Canadian-made high-quality dew heater with a uniform heating element distribution, known for long-term durability and even heat spread across the full circumference of the objective.
Dew-Not Dew Heater Strips (Various Sizes)
An affordable dew heater strip range with velcro attachment and a standard RCA phono connector, compatible with all major dew controllers and sized for objectives from 1.25 inches to 12 inches.
Choosing a dew controller: from budget to fully automated
A dew controller regulates the power delivered to each heater strip using pulse-width modulation. Running heaters at full power wastes battery life and can warm the objective enough to induce thermal seeing effects in the image. A controller keeps each heater at the minimum power needed to stay above the dew point.
For a basic two-scope setup on a budget, the Dew-Buster DB-1 Dual-Channel Dew Controller is a proven analog rheostat controller with two channels. No software, no USB, just two knobs to set each channel manually. It has been a reliable workhorse for over a decade and is the least expensive path to controlled dew prevention.
For a two-scope setup with better build quality and more precise PWM control, the Pegasus Astro DewZap Dual-Channel Dew Controller is the step up. Two independent channels, the same build quality as the rest of the Pegasus lineup, and a compact form factor that takes almost no space in the equipment bag.
For a full rig with four or five dew-sensitive surfaces, the Pegasus Astro DewMaster 2 Digital Dew Controller is the right tool. Five individually controlled PWM channels, a built-in temperature and humidity sensor that automatically adjusts power as the night gets colder and more humid, USB-C and Wi-Fi connectivity, and full remote control via the Pegasus Unity Platform or the Pegasus iOS and Android app. This is the controller for unattended or remote imaging sessions where you cannot physically adjust a manual knob at midnight when the temperature drops.
Dew-Buster DB-1 Dual-Channel Dew Controller
A simple two-channel dew controller with manual rheostat adjustment that has been a reliable budget alternative to Pegasus and Kendrick controllers for over a decade.
Pegasus Astro DewZap Dual-Channel Dew Controller
A compact two-channel PWM dew controller from Pegasus Astro with per-channel adjustment knobs and the same build quality as the DewMaster at a lower price.
Pegasus Astro DewMaster 2 Digital Dew Controller
A five-channel PWM dew heater controller with a built-in temperature and humidity sensor, USB-C, and Wi-Fi for full software automation of dew prevention across an entire imaging rig.
Connecting everything to a smart power hub
A smart power hub like the Pegasus Astro Ultimate Powerbox v3 or the compact Pegasus Astro Pocket Powerbox Advance Gen2 does double duty: it distributes regulated 12V power to every device on the mount and includes integrated dew heater channels that are individually controllable from software. For imagers who want to simplify their cable layout, combining the power distribution and dew control functions into a single Pegasus device is an elegant solution.
The Pocket Powerbox Advance Gen2 is the most compact option for travel and rooftop setups, mounting directly on the optical tube assembly and running both dew heaters and USB devices from one box. The Ultimate Powerbox v3 is the choice for a permanent or semi-permanent observatory setup with more channels, higher current capacity, and deeper software integration with NINA and Sequence Generator Pro.

Pegasus Astro Ultimate Powerbox v3
A smart power hub and USB controller that distributes regulated 12V power to mounts, cameras, dew heaters, and focusers through software-controlled outputs, with current monitoring and scripting via the Pegasus Unity Platform.
Pegasus Astro Pocket Powerbox Advance Gen2
A compact field power hub with four 12V outputs, USB 3.0 ports, and a built-in dew heater controller that gives you smart power management in a pocket-sized box for travel rigs.
Power planning for an all-night session
Dew heaters draw a small but continuous load. A single mid-sized heater at 50 percent PWM draws roughly three to seven watts. Four heaters at 50 percent add twenty to thirty watts, which over a six-hour session totals 120 to 180 watt-hours. Add the mount at approximately fifteen to thirty watts, imaging camera at five to fifteen watts, guide camera at about three watts, and a mini-PC or ASIAIR at ten to twenty-five watts, and a full rig draws sixty to a hundred watts continuously.
For portable power, a 500 Wh station lasts approximately five hours on a full rig and is the minimum practical capacity for an all-night session. A 1000 Wh station gives comfortable margin for a full night with power to spare for a second night if you are at a star party. These are estimates based on typical equipment loads; your specific draw will depend on your actual gear and ambient temperature.
Featured in this guide
Pegasus Astro DewMaster 2 Digital Dew Controller
A five-channel PWM dew heater controller with a built-in temperature and humidity sensor, USB-C, and Wi-Fi for full software automation of dew prevention across an entire imaging rig.
Pegasus Astro DewZap Dual-Channel Dew Controller
A compact two-channel PWM dew controller from Pegasus Astro with per-channel adjustment knobs and the same build quality as the DewMaster at a lower price.
Dew-Not Dew Heater Strips (Various Sizes)
An affordable dew heater strip range with velcro attachment and a standard RCA phono connector, compatible with all major dew controllers and sized for objectives from 1.25 inches to 12 inches.
Kendrick Astro Firefly Dew Heater Strip
A Canadian-made high-quality dew heater with a uniform heating element distribution, known for long-term durability and even heat spread across the full circumference of the objective.
Dew-Buster DB-1 Dual-Channel Dew Controller
A simple two-channel dew controller with manual rheostat adjustment that has been a reliable budget alternative to Pegasus and Kendrick controllers for over a decade.
Related roundups
FAQ
Frequently asked questions
Do I really need a dew controller, or can I just run the heaters at full power?+
Running heaters at full power wastes battery and can warm the optics enough to create thermal turbulence in the image, which shows as soft or bloated stars. A PWM controller runs each heater at the minimum power needed to stay above the dew point, which is typically 30 to 50 percent. A smart controller with a temperature and humidity sensor adjusts automatically as conditions change through the night, which matters when temperatures drop several degrees between midnight and dawn.
How do I know what size dew heater to order for my telescope?+
Measure the outside diameter of the dew shield or lens cell, not the aperture. A 4 inch aperture refractor may have a 5 inch outer diameter dew shield, and you need a heater sized to wrap around that outer diameter. Most manufacturers publish a size chart matching their heater sizes to common telescope models. If you are between sizes, go slightly larger; a heater that cannot close properly around the optic cannot heat it evenly.
Should I heat my guide scope too?+
Yes, always. The guide scope is one of the most commonly overlooked dew surfaces. When the guide scope lens dews over, the guide camera loses the guide star and autoguiding fails, which ruins every subsequent frame from that point forward. A cheap dew heater strip on the guide scope objective is the most cost-effective single upgrade many astrophotographers can make, costing under $30 and protecting every session.
When should I turn the dew heaters on?+
Turn dew heaters on before dew forms, at the start of the session, not after you have already noticed fogging. Once dew has condensed on an optical surface, a low-power heater needs time to drive it off and may leave residue that degrades the coating over time. Starting the heaters at low power before imaging begins prevents the problem entirely rather than reacting to it.